

Published on
June 24, 2024
Setting up Citrix Federated Authentication Service (FAS) with WinHorizon and Evertrust Horizon requires attention to detail and adherence to specific pre-requisites and procedural steps. This guide provides a comprehensive, step-by-step process to ensure a seamless integration, facilitating a secure and efficient authentication environment within your Active Directory (AD) domain.
Before beginning, this setup requires some pre-requisites, namely:
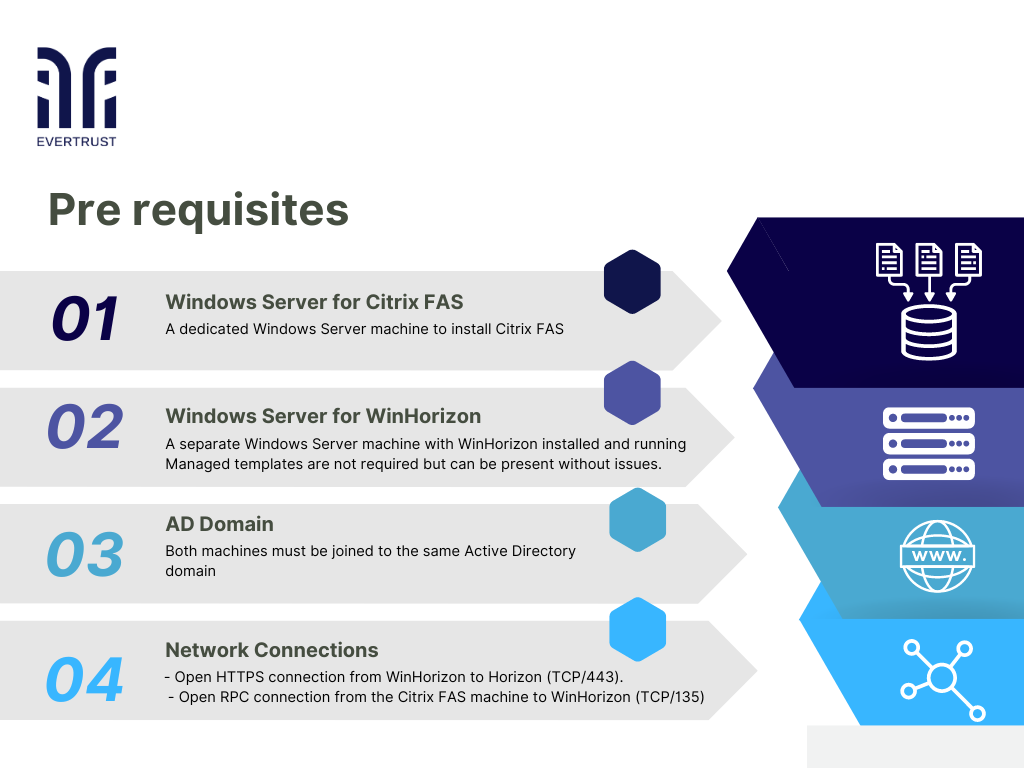 Pre requisites
Setup procedure
Note: The Citrix FAS installation must be performed using an Enterprise Administrator account within the designated domain
1. Install Citrix FAS: Install the Citrix FAS MSI package (FederatedAuthenticationService_XX_XX_XXX_x64.msi)
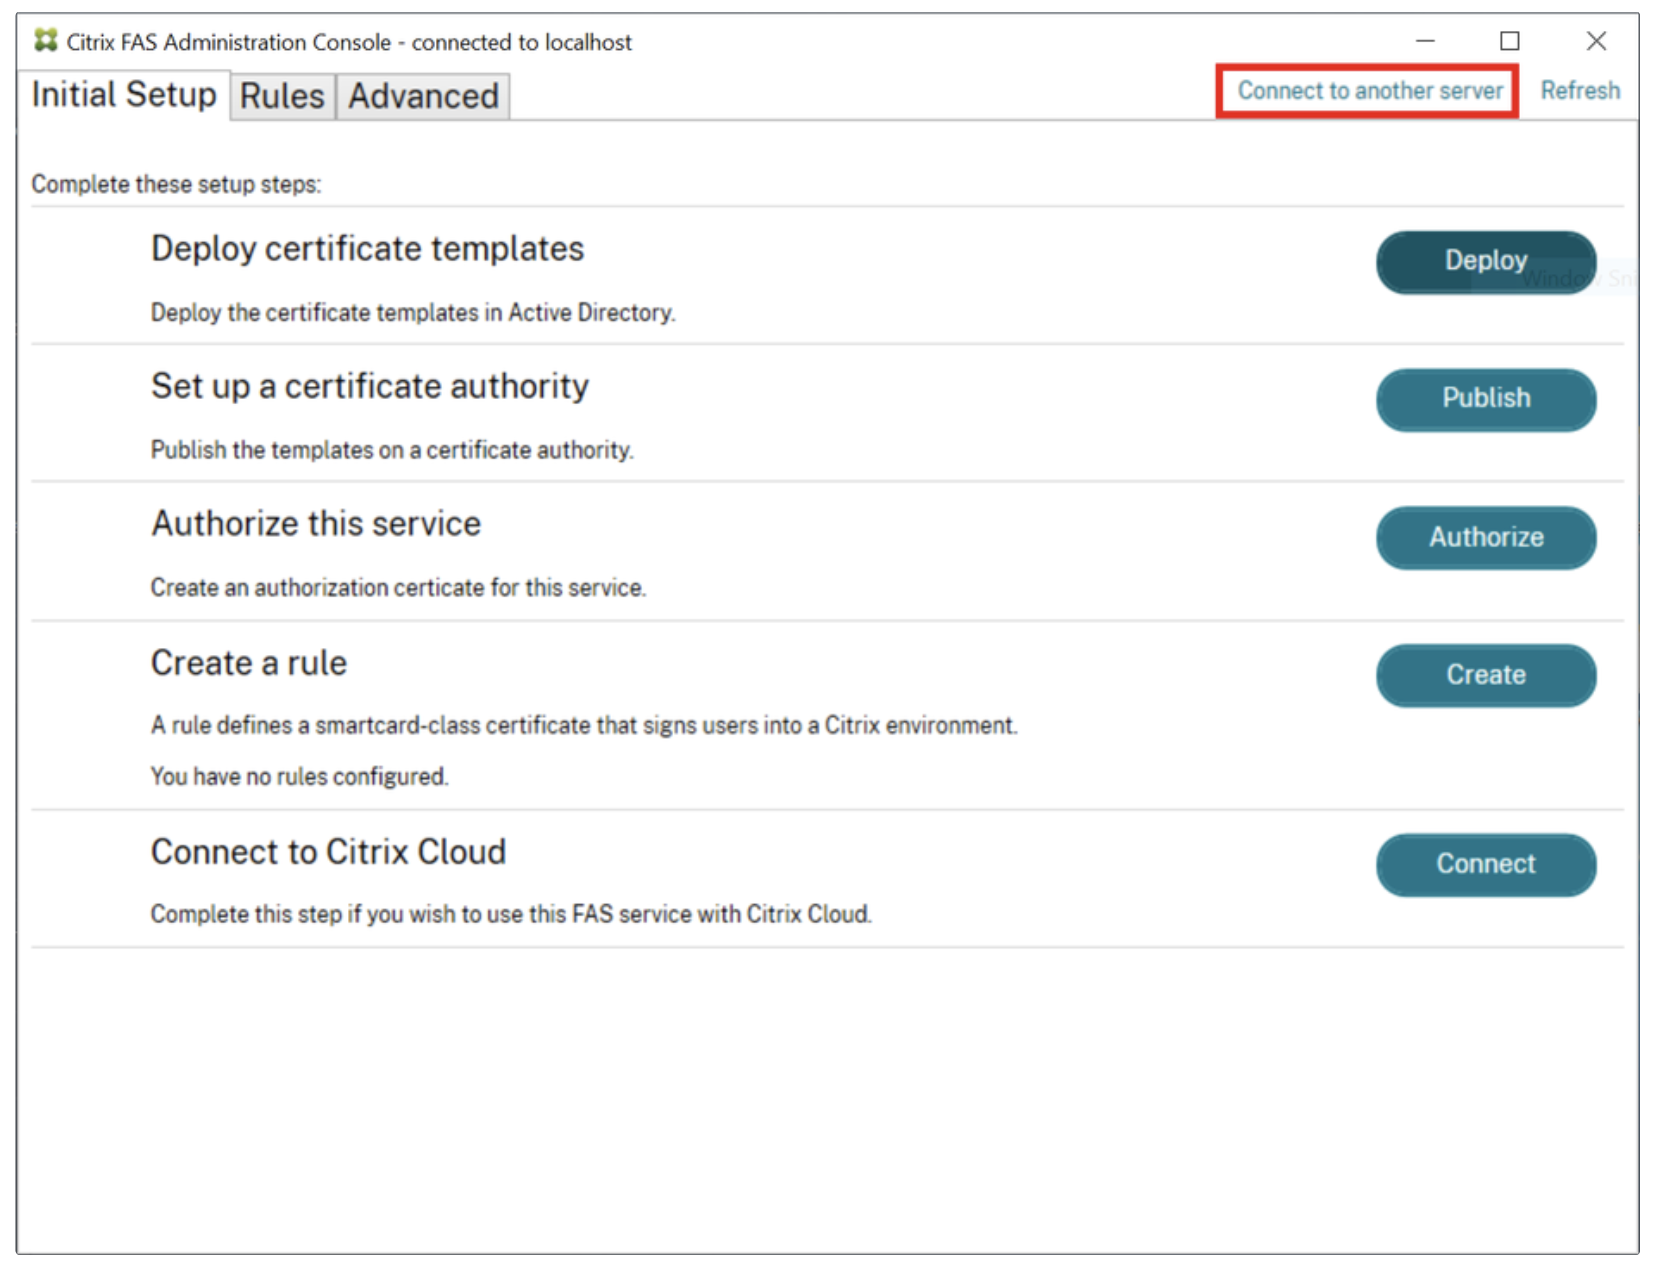
2. Run Administration Console: Launch the Citrix FAS Administration console as an Enterprise Administrator
3. Connect to Remote Server (Optional): If the Citrix FAS server is installed on a different machine, click "Connect to another server" and enter the FQDN of the machine (must be in the same domain).
 Administration Console
4. Deploy Certificate Templates:
In the “Deploy certificate templates” section, click “Deploy” and then “OK”
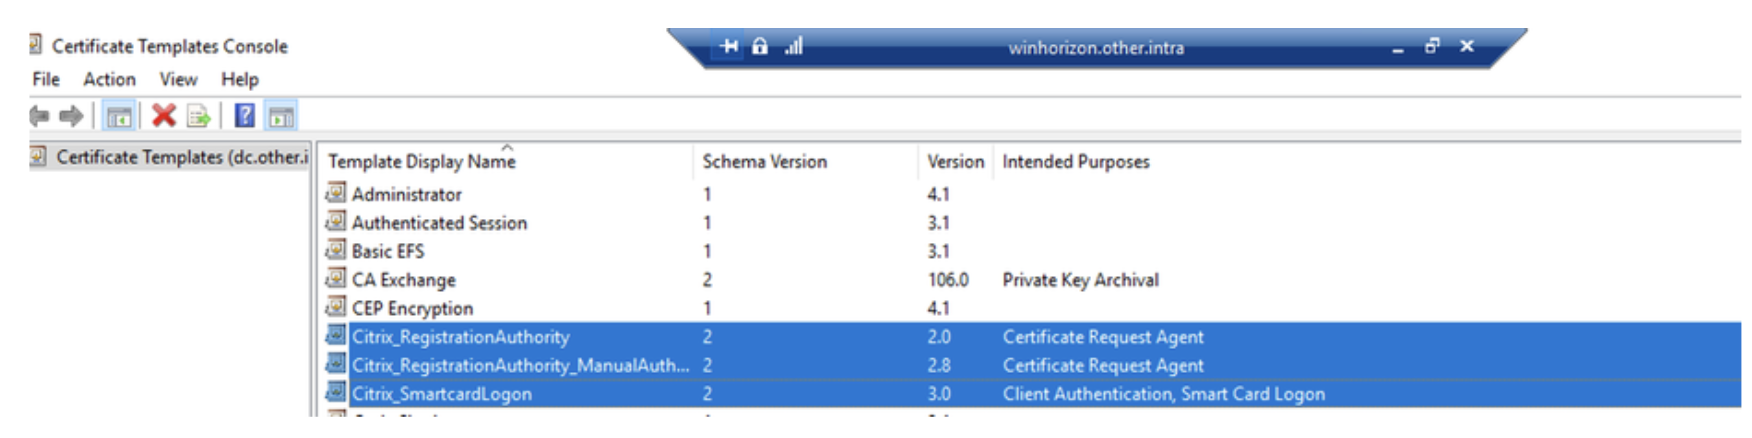
This will deploy the following Microsoft Certificate Templates in the current AD Forest
- Citrix_RegistrationAuthority_ManualAuthorization
- Citrix_RegistrationAuthority
- Citrix_SmartcardLogon
 Deploy interface
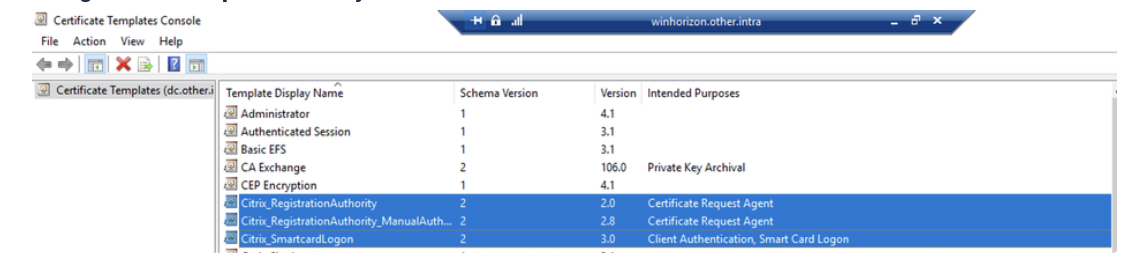
5. Verify Template Deployment: Use the “certtmpl.msc” utility to ensure the templates have been deployed. Modify the Citrix_RegistrationAuthority_ManualAuthorization template by unchecking the “CA manager approval” checkbox in the “Issuance Requirements” tab.
 Certificate Templates Console
6. Configure WinHorizon:
On the WinHorizon machine, start the “EVERTRUST WinHorizon Configurator” as Enterprise Admin
Click the “Templates” button, add the three Citrix templates from step 4, and sav
Setting up Horizon
7. Log in to Horizon Console: Access the Horizon web administration console, navigate to the “Configuration” menu, then to “Protocols” > “WCCE” > “Profiles”, and create three WCCE profiles with the specified configurations.
Want to implement these PKI practices?
Get expert guidance on implementing secure PKI solutions for your organization.
Get Expert Help| Profile name (example) | Profile use-case |
|---|---|
| stream_citrix_e_agent | Issue the initial enrollment agent certificate |
| stream_citrix_ra | Issue certificates for the Citrix FAS Registration Authority |
| stream_citrix_sc_logon | Issue certificates for SmartCard Logon |
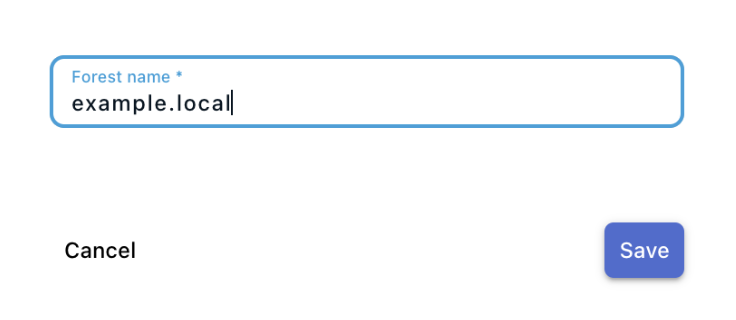
8. Declare WCCE Forest: In the Horizon Configuration menu, go to “Protocols” > “WCCE” > “Forests” and declare a new WCCE forest using your AD forest’s FQDN (not the NETBIOS name)
 Configuration Menu
9. Create WCCE Mappings: After declaring the forest, create three WCCE mappings by clicking the + button next to the forest’s name. No EOBO CA specification is necessary.
 Forest Configuration
The mappings should be as follow:
| Microsoft Template Name | Enrollment Mode | WCCE Profile (example) |
|---|---|---|
| Citrix_RegistrationAuthority_ManualAuthorization | Entity | stream_citrix_e_agent |
| Citrix_SmartcardLogon | Enroll On Behalf Of | stream_citrix_sc_logon |
| Citrix_RegistrationAuthority | Enroll On Behalf Of | stream_citrix_ra |
There is no need to specify any EOBO CA when prompted.
Although the WCCE profile names may change for your configuration, the Microsoft Template name should be exactly the same as in the above table as they were automatically created by Citrix FAS previously.
The forest’s mappings should look like this eventually:
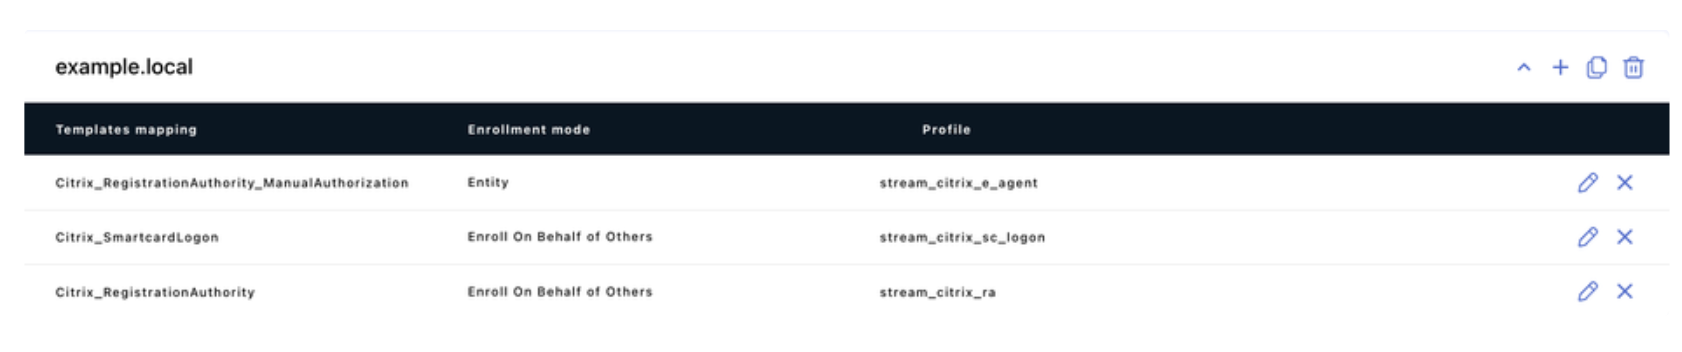 Forest mapping
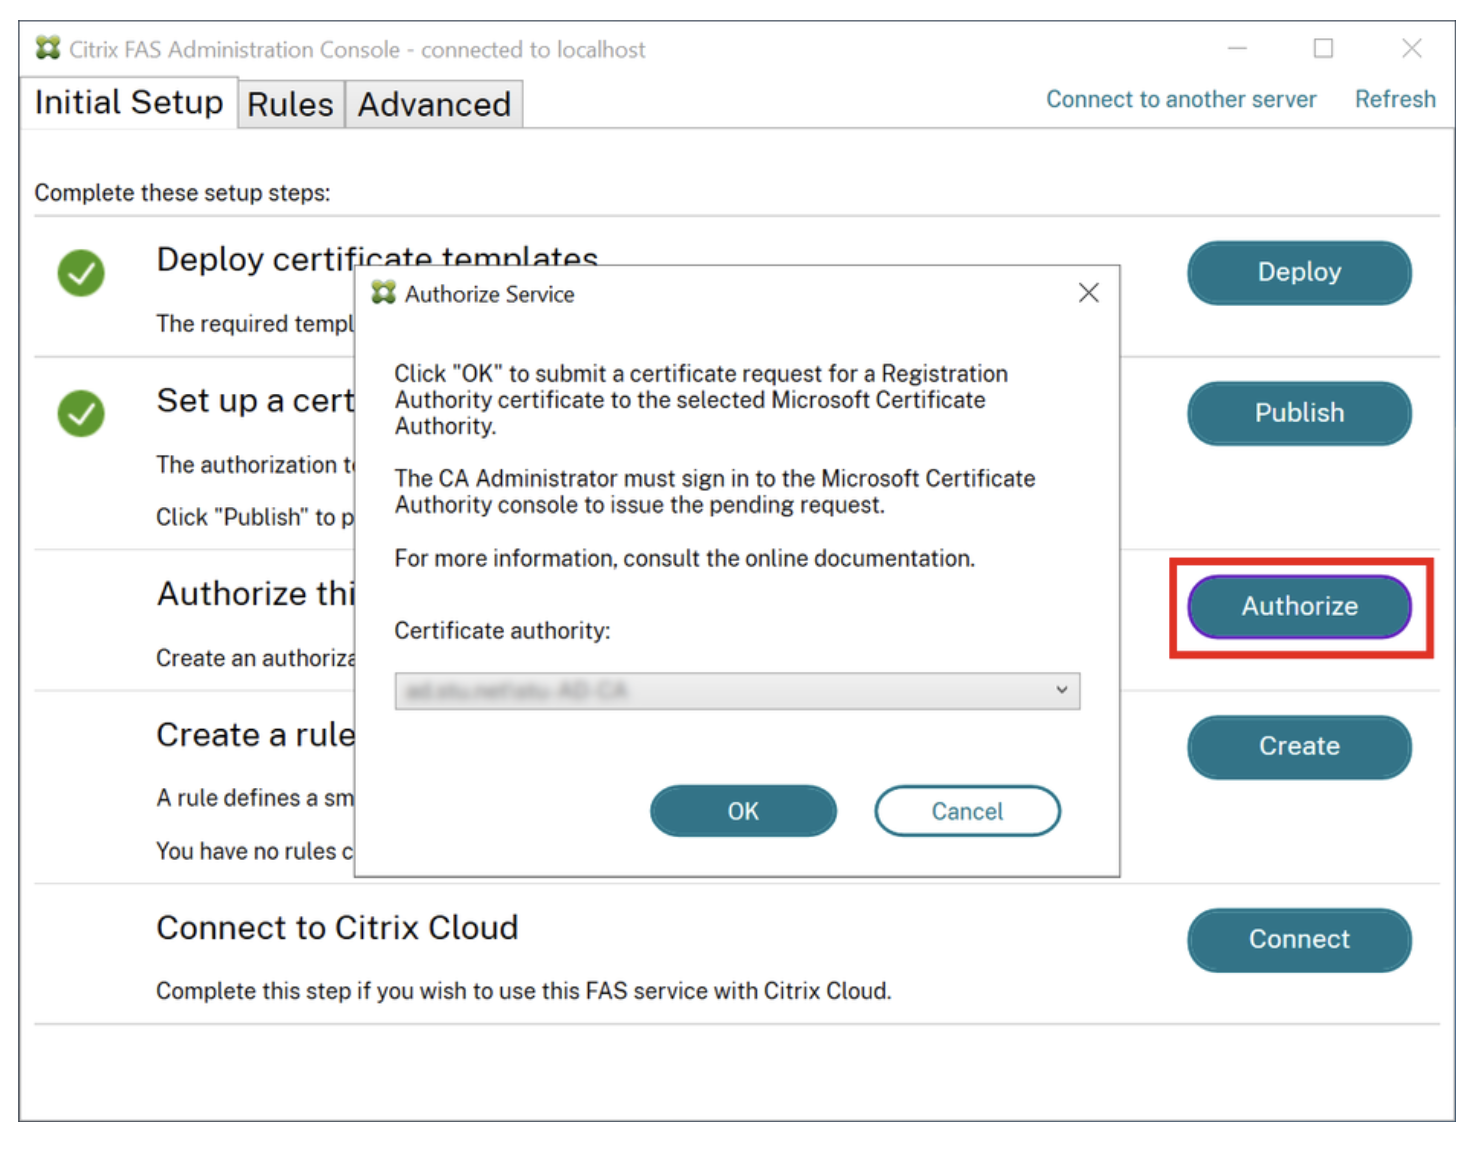
10. Authorize Service:
In the “Authorize this service” section, click “Authorize”
Select the WinHorizon CA from the drop-down menu and click “OK”
This will issue a certificate request in Horizon, which should be automatically approved, issuing a certificate on your underlying PKI.
 Citrix FAS Console
From the drop-down menu, select the WinHorizon CA and click “OK”. This should issue a certificate request in Horizon that should be automatically approved, hence issue a certificate immediately on your underlying PKI.
11. Modify Certificate Template: Using the “certtmpl.msc” utility, modify the Citrix_RegistrationAuthority_ManualAuthorization template by checking the “CA manager approval” checkbox in the “Issuance Requirements” tab.
 certtmpl.msc Utility
12. Create Authorization Rule: In the “Create a rule” section, click “Create” and name the rule “default"
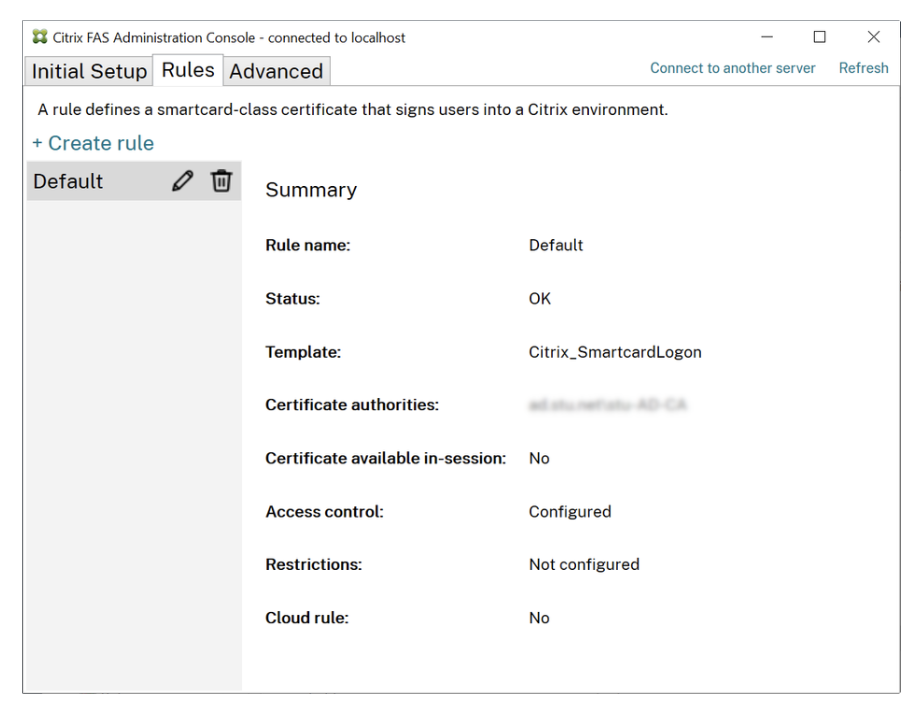 FAS Administration Console
13. Configure Registry: On the Citrix FAS server, run regedit and navigate to the specified registry key location to ensure configuration accuracy
Computer\HKEY_LOCAL_MACHINE\SOFTWARE\Policies\Citrix\Authentication\UserCredentialService\Addresses
You should manually create any of the missing key in the aforementioned path, should there be any missing. and create the following value:
| Value Name | Value Type | Value |
|---|---|---|
| Address1 | REG_SZ | <FQDN of the Citrix FAS server> (example: citrixfas.example.local) |
Finally, in order to check that the setup is successful, you might want to perform the two following steps.
14. Create User List: Create a file named `users_list.csv` with the specified content.
"UserPrincipalName"
"[email protected]"
"[email protected]"
15. Run PowerShell Script:
Open a PowerShell instance as an administrator, navigate to the path where the CSV file is saved, and run the provided script.
The enrolled certificates should now be visible in Horizon and on your PKI.
# Add the Citrix PowerShell Snap-ins
Add-PSSnapin Citrix.A*

# CSV file name
$csv = "users_list.csv"

# Default rule created in the admin console
$rule = "default"

# Import the users from the CSV file
$users = Import-Csv -Encoding utf8 $csv

# Loop through each user in the CSV file
foreach ($user in $users) {
    # Get the FAS server for the user
    $server = Get-FasServerForUser -UserPrincipalNames $user.UserPrincipalName

    # Check if the primary server is not null and create a certificate
    if ($server.Server -ne $NULL) {
        New-FasUserCertificate -Address $server.Server -UserPrincipalName $user.UserPrincipalName -CertificateDefinition $rule
    }

    # Check if the failover server is not null and create a certificate
    if ($server.Failover -ne $NULL) {
        New-FasUserCertificate -Address $server.Failover -UserPrincipalName $user.UserPrincipalName -CertificateDefinition $rule
    }
}
By following this detailed setup guide, you ensure a robust integration of Citrix FAS with WinHorizon and Evertrust Horizon, enhancing your authentication infrastructure's security and efficiency. Adhering to the specified pre-requisites and procedural steps guarantees a smooth implementation, facilitating a seamless user experience within your Active Directory domain.